Список инструментов, необходимых для клонирования:
1. Цифровая камера (пленочную тоже можно, но сложно)
2. Тренога – необходимая вещь
3. Adobe Photoshop или аналог, который вам нравится
Если у Вас все это есть и вы умеете этим пользоваться – начнем!
Шаг 1
Прикрепите Вашу цифровую камеру на треногу и найдите хорошее место для «клонирования». Самые интересные для этого места, такие, где есть что-то вроде ряда стульев, телефон-автоматов, или большое открытое пространство, возможно туалет с зеркалами (с зеркалами всегда интересно играть) или даже просто ваша комната. Не ограничивайте своё воображение!
Шаг 2
Поместите Вашу прикрепленную на треногу цифровую камеру в место, откуда будете снимать. Если Вы работаете один (одна), удостоверьтесь, что Вам не помешает толпа людей, которые не только могут испортить кадр, но и унести Вашу камеру вместе с треногой, в то время как Вы будете бегать с одного места на другое. Будьте внимательны! (советую оглядеться и сразу определитесь с местами в которых Вы будете позировать и с собственно позами).
Шаг 3
Нажмите на «спусковой крючок» Вашей камеры и бегите к первому месту, в котором Вы хотите, чтобы находился Ваш клон. Как только Вы окажетесь на месте, примите позу, которую более не повторяйте. Не упускайте из виду индикатор таймера на камере и не забывайте о времени.
Шаг 4
Важное примечание — не сдвигайте вашу камеру с ее первоначальной позиции! Оставьте камеру на вашей треноге, и оставьте треногу там, где она и была до этого, не перемещайте ничего. Вы можете посмотреть Ваш первый снимок, но осторожно – не сдвиньте камеру, когда будете нажимать кнопки. Если Вы хотя бы немного сдвинете камеру, то уже не сможете восстановить ее положение на 100%, и Ваш следующий снимок не будет соответствовать первому, если все же камера сместилась, я бы посоветовал повторить Шаг 3.
Шаг 5
Повторите Шаг 3 в другой позе и в другом месте.
Шаг 6
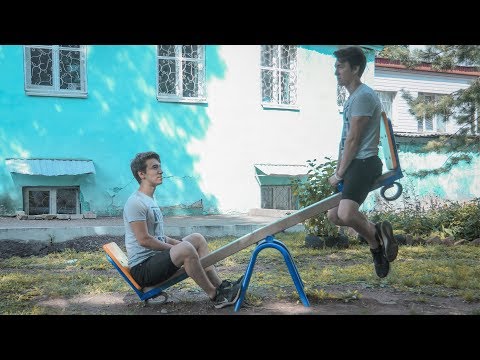
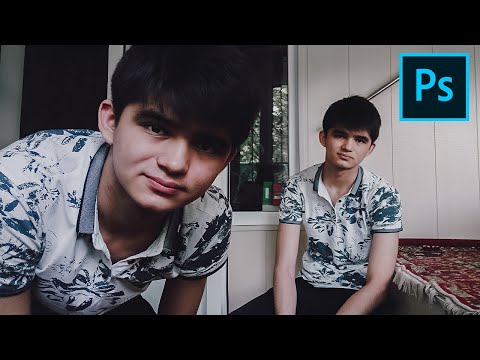
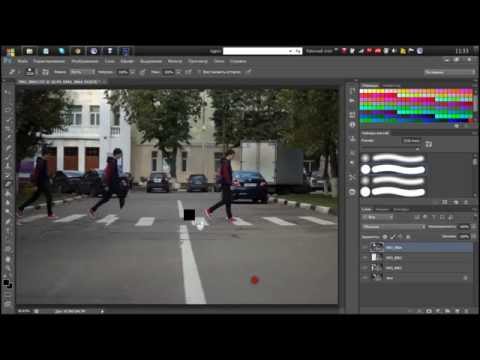
Можете повторить Шаг 5, но так как это — руководство для новичка, я остановлюсь на создании только пары клонов, чтобы упростить работу. Я буду использовать эти два изображения:
Шаг 7
Откройте снимки в Photoshop. Я бы советовал использовать фотографию с самым чистым фоном (с наименьшим количеством посторонних предметов и людей в кадре) в качестве нижнего слоя.
На этом этапе постарайтесь максимально выровнять изображения друг относительно друга. Если Шаг 5 получился у Вас хорошо, то выравнивание изображений не составит труда, или даже вообще ничего не придется выравнивать.
Шаг 8
Так как мы работаем только с двумя фотографиями, выбираем верхний слой со второй фотографией и добавляем векторную маску.
Шаг 9
Не кликая после Шага 8 где-нибудь еще, нажмите Alt + Backspace, чтобы заполнить векторную маску черным. (Опция + Возврат на один символ для пользователей Макинтоша). Если Вы все же кликнули где-то в другом месте, удостоверьтесь, что Вы нажимаете на векторную маску, прежде чем нажать Alt + Backspace. Это действие скрывает верхний слой от отображения. Следующие шаги позволят отображать только определенные части верхнего слоя.
Шаг 10
Щелкните правой кнопкой мыши на векторной маске, и выберите Disable Layer Mask (Отключить Маску Слоя). Это позволяет Вам временно отобразить верхний слой.
Шаг 11
Выберите инструмент Brush (Кисть) (нажмите кнопку B ), и выберите жесткую круглую кисть размером примерно 35 пикселей (зависит от Ваших изображений).
Шаг 12
Установите белый цвет как основной (foreground color). Как это быстро сделать показано на рисунке ниже:
Шаг 13
Итак, Вы выбрали Brush Tool (Кисть), предпочтительно с жесткой круглой кистью примерно 35 пикселей, и установили основной цвет – белый. Векторная маска для верхнего слоя тоже уже должна быть заблокирована (Шаг 10).
Теперь, Вы можете щелкнуть правой кнопкой мыши на верхнем слое и нажать, Enable Layer Mask, чтобы увидеть прогресс.
Если Вы считаете, что отобразилось слишком большая часть верхнего слоя, можете изменить основной цвет на черный и «стереть» часть изображения, которую Вы открыли белой кистью. Конечно, всегда можно воспользоваться панелью History или Ctrl + Alt + Z, чтобы отменить последнее действие.
Не забывайте отобразить все тени и отражения Вашего клона.
Шаг 14
Как только все сделано, жмите Enable Layer Mask. Вы должны будете увидеть что-то в этом роде:
После того, как научитесь на простых вещах, можете сделать больше своих клонов.
Автор: Zul
Photo Editor — лучший бесплатный фоторедактор для Android
Предназначение программы Photo Editor полностью соответствует её названию — это редактор для обработки ваших фотографий. И хотя приложений для работы с картинками под Android вроде бы хватает, смею вас заверить, что этому редактору есть чем вас удивить.

Сразу после установки и запуска вас встретит стартовый экран, предлагающий выбрать файл для редактирования. Вы можете указать на уже существующее фото из стандартной системной галереи или файлового менеджера, а также сделать новый снимок с помощью камеры устройства.
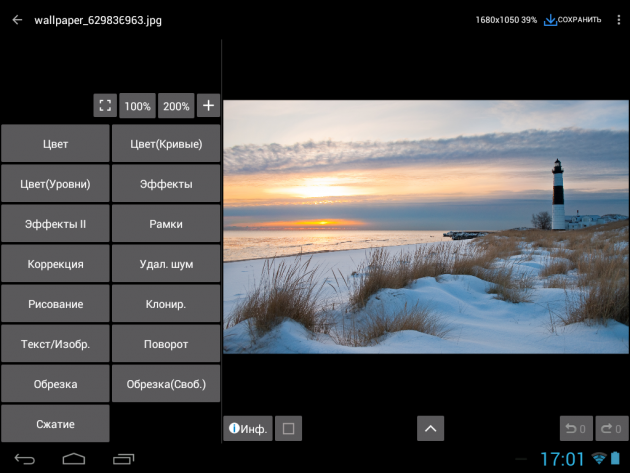
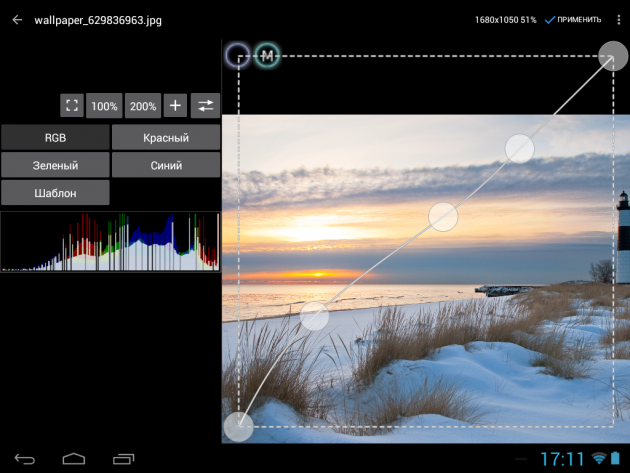
После этого картинка откроется в области редактирования, слева от которой находится панель с основными инструментами. Я тестировал программу на планшете, но использование Photo Editor на смартфоне тоже вполне возможно, хотя и менее удобно. Среди инструментов имеются как базовые функции обработки снимков, так и довольно продвинутые возможности цветовой коррекции, в том числе с помощью кривых.
Полное описание всех возможностей Photo Editor заняло бы не одну страницу, поэтому ограничимся их кратким перечислением и демонстрацией видео, которое даст вам представление о работе этого редактора.
Итак, с помощью программы Photo Editor вы сможете выполнить следующие операции:
- обрезку снимков вручную, согласно заданным пропорциям или фигурой произвольной формы;
- регулировку экспозиции, яркости, контрастности;
- регулировку цветопередачи по отдельным каналам и с помощью кривых;
- коррекцию перспективы, отбеливание, удаление красных глаз;
- удаление шума;
- рисование, нанесение текста, добавление других изображений;
- клонирование одного участка снимка на другой;
- применение большого количества эффектов, каждый из которых может быть настроен;
- наложение нескольких видов рамок.
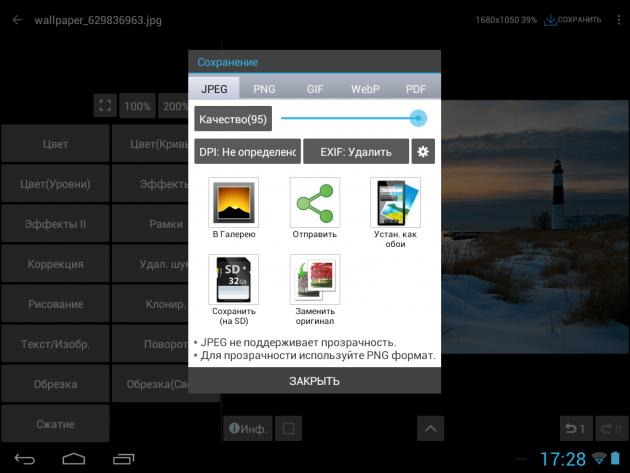
Готовое изображение можно сохранить на своё устройство или поделиться им с помощью стандартного меню расшаривания. Программа Photo Editor способна сохранять файлы в форматах JPG, PNG (поддерживается прозрачность), GIF, WebP, PDF.
Единственный минус, которым можно попрекнуть создателей программы, заключается в несколько устарелом и слишком простом оформлении Photo Editor. Но, с другой стороны, мы видели уже достаточно приложений, где за эффектным внешним видом скрывается совершенно никчёмная сущность. Так что лучше уж так — простенько, но зато очень полезно и совершенно бесплатно.

Цена: Бесплатно
Клонирование в Photoshop | Видео
Для просмотра онлайн кликните на видео ⤵
Учимся клонировать участки изображения в Photoshop Подробнее
Как Делают ТАКИЕ Фотографии — Фотошоповские Близнецы! Подробнее

47 Штамп клонирования Photoshop CS6 Подробнее
КЛОНИРОВАНИЕ — Photoshop (Фотошоп) за один день! — Урок 6 Подробнее

КЛОНИРОВАНИЕ В ФОТОШОПЕ Подробнее
Adobe Photoshop — Действия с выделенной областью Подробнее
Инструмент Штамп в Photoshop CC 2019 Подробнее
Как копировать 🎅 дублировать предметы Инструментом выделение ❤ 3 способа Adobe Illustrator Урок 28 Подробнее
Уроки Фотошоп — Выделение и Клонирование объекта Подробнее
WDI PS. Как быстро выделить, скопировать, выровнять объекты. Подробнее
клонирование в фотошоп Подробнее
Как Делают Такие Фотографии — Клонирование в Фотошоп (2020) Подробнее
КАК КЛОНИРОВАТЬ СЕБЯ? Подробнее

КОПИРОВАНИЕ ОБЪЕКТОВ. 8 СПОСОБОВ. Adobe Illustrator Подробнее

Урок фотошоп: как лицо с одной фотографии вставить на другую? Клонирование Подробнее

Инструмент перемещение с учётом содержимого в фотошопе Подробнее
Tutorial за 5 минут , клонирование на фотографии. Подробнее
КАК КЛОНИРОВАТЬ СЕБЯ В ФОТОШОПЕ!? Подробнее

Подделать любой голос теперь не проблема! Компания Adobe выпустила «фотошоп» для голоса. #Voco Подробнее

КЛОНИРОВАНИЕ В ФОТОШОПЕ | Видео
Для просмотра онлайн кликните на видео ⤵
Учимся клонировать участки изображения в Photoshop Подробнее
Клонирование в Photoshop Подробнее
Как Делают ТАКИЕ Фотографии — Фотошоповские Близнецы! Подробнее
47 Штамп клонирования Photoshop CS6 Подробнее
Adobe Photoshop — Действия с выделенной областью Подробнее
КЛОНИРОВАНИЕ — Photoshop (Фотошоп) за один день! — Урок 6 Подробнее
Как копировать 🎅 дублировать предметы Инструментом выделение ❤ 3 способа Adobe Illustrator Урок 28 Подробнее
Инструмент Штамп в Photoshop CC 2019 Подробнее
WDI PS. Как быстро выделить, скопировать, выровнять объекты. Подробнее
Уроки Фотошоп — Выделение и Клонирование объекта Подробнее
КАК КЛОНИРОВАТЬ СЕБЯ? Подробнее
Как создать, дублировать, копировать, перемещать и обединять слои Подробнее
Инструмент перемещение с учётом содержимого в фотошопе Подробнее
КАК КЛОНИРОВАТЬ СЕБЯ В ФОТОШОПЕ!? Подробнее
Как Делают Такие Фотографии — Клонирование в Фотошоп (2020) Подробнее
Tutorial за 5 минут , клонирование на фотографии. Подробнее
Урок фотошоп: как лицо с одной фотографии вставить на другую? Клонирование Подробнее
клонирование в фотошоп Подробнее
How to Photoshop? #1 «Клонирование» Подробнее
Здравствуйте дорогие читатаели Блога. Представляю Вашему вниманию первую часть пошагового урока, — Ретуширование клонирующими инструментами в Photoshop. Прошлая тема: — Аэрографирование в Photoshop
Ретуширование
Пристально разглядывая рекламные фотографии, вы наверняка заметите, что в кадр редко попадают случайные линии электропередач или транспортные средства. Вы также обратите внимание, что у моделей на снимках всегда безупречная кожа, а в культовых туристических местах нет туристов.
Однако фотографы вовсе не тратят все свое время на поиски идеально красивых моделей или на посещения пустынных городов. Вместо этого они, обычно, просто удаляют ненужные объекты уже на готовом снимке, добиваясь, таким образом, желаемого результата, и делают это помощью инструментов клонирования (cloning tools) в таких программах для редактирования изображений, как Photoshop.
В этом уроке вы увидите, как ретушировать фотографии в Photoshop, удаляя ненужные объекты с помощью клонирующих инструментов. В первой части урока вы узнаете, для чего используются эти инструменты и как их применять, чтобы избавиться от дефектов и недостатков. Вы также узнаете о различных вариантах клонирования, сочетанием которых можно достичь высокого качества ретуши.
Каким образом можно убрать объект с изображения
Допустим, вы сделали фотографию, а попавший в кадр совсем не к месту фонарный столб раздражает вас. Как избавиться от него? Если вы удалите или сотрете столб, не останется ли это место пустым? Как Photoshop узнает, что будет на месте неугодного объекта?
Гм … и как же быть?
Хитрость заключается в том, чтобы нарисовать поверх объекта, а не просто удалить его. Используя инструменты клонирования, профессиональные фотографы по существу делают оттиски информации и деталей в различных участках фотографии и накладывают их прямо на части изображения, которое подлежит удалению. Функция клонирующих инструментов фактически сводится к копированию, вставке и «вживлению» одной части изображения в другую.
Но не будет ли это слишком заметно, если просто реплицировать ту же самую область?
Нет, так будет неправильно.
Если не брать образец для клонирования в непосредственной близости от исходной области, а скопировать несколько различных участков фотографии, можно действительно сделать так, что клонированный объект будет выглядеть довольно естественно и без швов.
Клонирующие инструменты
На большинстве фотографий есть большие однородные области, где смежные участки изображения похожи друг на друга. Используя инструменты клонирования, можно легко скопировать несколько фрагментов из различных областей фотографии, которые похожи на окружение нежелательного объекта, и скомпоновать их вместе, в стиле Франкенштейна.
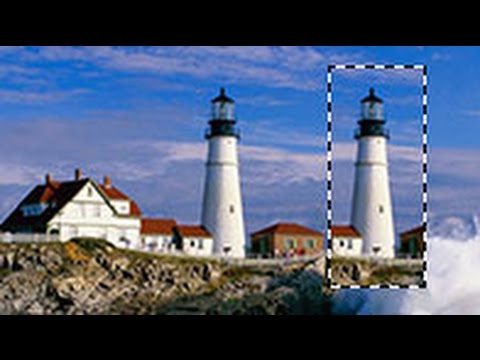
Возьмем, например, эту фотографию пляжа.
Просто райский вид, если бы не мешал этот ярко-красный знак.
Только небо, океан и песок, и все эти области выглядят довольно однообразно. Пляж испещрен похожими друг на друга следами на песке, в океане ровные, одинаковые гряды волн, а небо покрыто облаками и голубыми градиентами.
Допустим, вы хотите убрать с изображения красную табличку. Это можно сделать, взяв образцы в различных участках пляжа и океана (уреза воды), и перетащив их на знак, как на рисунке ниже.
Скопируйте ближние фрагменты песка/океана вблизи таблички и наложите их на знак.
Йес! Нет больше знака.
Видите? Не осталось и следа, если вы знаете, что делаете.
Как же работает отбор образцов для клонирования в Photoshop?
Отбор образцов – это реакция Photoshop на вашу команду, когда вы указываете программе, какой именно фрагмент изображения нужно скопировать. Это все равно, что сказать: «Привет Photoshop! Вот образец того, как должно выглядеть изображение в том месте, где я рисую на нем. Для большинства инструментов клонирования все, что вам нужно сделать, это щелкнуть мышкой с нажатой клавишей Alt по участку, выбранному в качестве образца для клонирования, затем кликнуть в области, куда вы хотите скопировать образец.
Поскольку вы человек, а человеку свойственно ошибаться, желательно всегда ретушировать на новом слое (Ctrl+Shift+N), чтобы сохранить оригинал на случай, если вы ошибетесь.
Тем не менее, если вы создадите новый слой, а затем попытаетесь взять на нем образец, ничего не получится, потому что слой сейчас пустой, и на нем нечего копировать. К счастью на панели настроек инструментов клонирования вверху есть опция под названием «Sample: All Layers» (Образец: Все слои), позволяющая брать информацию с каждого из нижележащих слоев (если их несколько). Если вы выберите в выпадающем списке этой опции вариант «Все слои», Photoshop для отбора образца задействует все слои.
Выберите «Sample: All Layers», чтобы снять копии образца со всех слоев.
Некоторые другие настройки опции Sample (Образец) позволяют использовать более конкретные варианты опробования с отбором образцов с «Активного слоя» (Current Layer) и с «Активного и ниже» (Current & Below). Это полезно, если вам приходится ретушировать несколько слоев.
Выберите вариант отбора образца.
Другие полезные опции
Для большинства инструментов клонирования можно настроить любые параметры, которые обычно доступны при использовании кисти. То есть вы можете изменить форму отпечатка кисти, размер (size), жесткость (hardness), интервалы (spacing), округлость (roundness), режим наложения (blending mode), непрозрачность (opacity) и т. д. Однако, в большинстве случаев вам придется использовать мягкую кисть, чтобы гармонично и мягко вписывать детали в окружающий фон.
Установите жесткость (hardness) на 0, чтобы при ретуши происходило максимальное смешивание с фоном.
Еще одна полезная опция называется «Aligned» (Выравнивание). Если не ставить галочку в чекбоксе «Выравнивание», то при отборе образца с нажатой клавишей Alt будет создан якорь, и эта базовая точка останется фиксированной в течение всего процесса ретуширования. И неважно, где вы щелкните на изображении, инструмент будет клонировать один и тот же, первоначально отобранный образец. Так, например, если вы, нажав Alt, кликните на бабочке (рисунок ниже), Photoshop будет клонировать ее в любом месте, где бы вы в дальнейшем не щелкнули.
Вот как будет происходить клонирование с отключенной опцией Aligned (Выравнивание).
Если вы включите опцию «Aligned» (Выравнивание) и, отобрав образец (Alt-Клик), щелкните первый раз где-нибудь на изображении, будет создан другой якорь. Расстояние и направление между этими двумя базовыми точками будут оставаться постоянными, во всяком случае якорь «Alt-Клик» в образе крестика будет перемещаться вместе с мышью.
Если вы находите такое объяснение невразумительным, попробуйте представить себе, что точка, в которой вы кликнули с нажатой клавишей Alt для отбора образца, связана нитью с тем местом, в котором вы затем щелкнули первый раз. При перемещении мыши, исходная (эталонная) точка следует за ней, поскольку обе точки связаны.
Вот как будет происходить клонирование с выбранной опцией Aligned (Выравнивание).
Теперь вы понимаете, как профессионалы используют клонирующие инструменты для удаления объектов на изображениях. Вы узнали, что такое отбор образцов и познакомились с различными вариантами команд, которые могут настроить работу программы так, как вам это нужно.
Переходим к следующей части.
Во второй части урока вы изучите каждый инструмент клонирования в Photoshop: Spot Healing Brush Tool (Точечная восстанавливающая кисть), Healing Brush Tool (Восстанавливающая кисть), Clone Stamp Tool (Штамп), и Patch Tool (Заплатка). Вы также узнаете об особенностях каждого инструмента, и с какими типами изображений каждый из них работает лучше всего, чтобы в дальнейшем вы могли выбрать правильный инструмент для работы.
Поделиться с друзьями:
90000 The Ultimate Guide To Clone Tools In Photoshop — Smashing Magazine 90001 90002 Photoshop’s wide array of cloning tools is the cause of many of the absolute best and worst works created with the application. In a skilled and experienced hand, these tools lead to phenomenal results. In the hands of a careless artist, Photoshop cloning can be disastrous to the credibility of the result. This article introduces 90003 the several cloning tools available in Photoshop 90004 and goes over the proper usage and best practices of each.90005 90006 90007 90002 Photoshop’s wide array of cloning tools is the cause of many of the absolute best and worst works created with the application. In a skilled and experienced hand, these tools lead to phenomenal results. In the hands of a careless artist, Photoshop cloning can be disastrous to the credibility of the result. This article introduces 90003 the several cloning tools available in Photoshop 90004 and goes over the proper usage and best practices of each. 90005 90012 Further Reading on SmashingMag: 90013 90012 The Clone Stamp Tool 90013 90002 The Clone Stamp tool is the oldest and most widely known of the cloning tools.The basic concept is that you duplicate certain portions of an image using a source, destination and brush. 90005 90002 90005 90002 Use the «Option» key ( «Alt») to set the source. 90005 90002 To clone out the name on the tombstone above, you would select a source that shares the texture of the area you want to replace. In this case, the area around the words provides an ample source of stone texture from which to clone. 90005 90002 To begin, simply click on the preferred source area while holding down the «Option» key ( «Alt» on a PC).Then, with no keys held down, begin painting over the area you want to replace. The image area from the source will be transferred to the destination. 90005 90002 To be able to use this tool effectively, let’s look at the relevant settings. 90005 90028 Basic Settings: Brush 90029 90002 Below, you’ll find the default settings when the clone stamp is selected. 90005 90002 90005 90002 The clone stamp’s basic settings. 90005 90002 The first setting you’ll want to familiarize yourself with is for the brush.Photoshop does not restrict cloning to a basic default brush. Instead, it allows you to use any brush you want, allowing you to create an unlimited number of effects. In the example above, and in most cases in fact, a small to medium-sized round 90003 soft brush gives the best result. 90004 90005 90002 90005 90002 A hard brush creates noticeable seams. 90005 90002 As you can see, a hard brush often creates visible edges along the path of the clone. The transition is much smoother on the left side, where a soft brush was used.Both sides suffer from noticeable replication, but this was intentional to exaggerate the cloned area. We’ll discuss how to avoid this later. 90005 90002 As stated, while a soft round brush is recommended for basic cloning, a number of interesting effects can be created using alternate brushes. For instance, below I’ve used a scatter brush shaped like a leaf to add some visual interest to the photo. 90005 90002 90005 90002 Use a scatter brush to create interesting particle effects. 90005 90002 Experiment with the opacity, blending mode and brush flow for an even wider variety of results.For more information on using these features, check out the article «Brushing Up on Photoshop’s Brush Tool.» 90005 90028 Basic Settings: Sample 90029 90002 Under the «Sample» menu are three options: 90057 Current Layer 90058, 90057 Current and Below 90058 and 90057 All Layers 90058. These options affect the area you are sourcing. Here’s a visual illustration of how each mode works: 90005 90002 90005 90002 The area cloned depends on the selected layer and sample mode. 90005 90002 As you can see, with 90057 Current Layer 90058 selected, the clone stamp ignores pixel data contained in any other layer.Conversely, 90057 All Layers 90058 ignores all layer distinction and clones any visible pixels in the document (invisible layers will be ignored). Finally, 90057 Current and Below 90058 samples pixels from the selected layer and any visible layers behind it. 90005 90028 Basic Settings: Adjustment Layers 90029 90002 The final basic setting (the circle with a diagonal line through it) lets you decide whether the clone stamp tool should sample adjustment layers when cloning. Adjustment layers, such as Hue / Saturation and Levels, are meant to be a non-destructive way to change the appearance of layers.So, you can make drastic changes to a layer or group of layers without destroying the original pixels. 90005 90002 Because of this, turning on 90057 Ignore Adjustment Layers When Cloning 90058 is almost always a good idea. This allows you to clone the original image, which can then be affected by an ever-changeable adjustment layer. If you do not choose to ignore the adjustment layer, the adjustment becomes permanent in the cloned areas. 90005 90002 In the layer set-up below, turning on 90057 Sample All Layers 90058 would by default clone pixels from both the background layer and the adjustment layer in the foreground.Turning on 90057 Ignore Adjustment Layers 90058 prevents this. 90005 90002 90005 90002 You can choose to ignore adjustment layers when cloning. 90005 90012 The Spot Healing Brush 90013 90002 As you can see below, the Spot Healing Brush tool is located under the Eyedropper tool and above the Brush tool, and it can be accessed quickly by hitting 90057 J 90058 on the keyboard. 90005 90002 90101 90005 90002 Type J to bring up the Spot Healing Brush. 90005 90002 The Spot Healing Brush is by far 90003 the simplest cloning tool in Photoshop 90004.With little to no experience, you can repair small areas of an image. The secret to using the tool is in the name: 90057 Spot 90058 Healing. The tool is intended not for large areas of replacement, but rather to remove little unwanted spots, such as a scratch on an old photograph or a mole on a person’s face. 90005 90002 To use the tool, 90003 simply hover over the area you want to replace and click once 90004. Photoshop does all the work by examining the pixel data around the spot and seamlessly integrating the data into the destination.90005 The Spot Healing Brush is perfect for repairing old photographs. 90002 As you can see above, the tool does a remarkable job of not leaving behind any noticeable artifacts or repeating patterns. The trick is to go slowly and work on very small portions of the image. Select a spot to fix, and 90003 use a brush that’s only slightly bigger than the selected imperfection. 90004 The larger the brush, the more likely you are to clone unwanted portions of the surrounding area, and the more noticeable the repetition of pixels will be.90005 Use a brush slightly bigger than the target spot. 90012 The Healing Brush 90013 90002 The Healing Brush tool, located under the Spot Healing Brush tool, is very similar to the Clone Stamp tool. To begin, 90057 Option + click 90058 (90057 Alt + click 90058 on a PC) to select your source, and then carefully paint over the destination to transfer the pixels. The Healing Brush performs this operation with 90003 more built-in intelligence than the Clone Stamp 90004. 90005 90002 As with the Spot Healing Brush, the Healing Brush attempts to automatically blend in the cloned pixels with the environment around it.90005 90002 90005 90002 The Healing Brush tool automatically blends the source with the destination. 90005 90002 As you can see, using the Clone Stamp to clone the puppy’s eye results in a straight copy of the pixels, while the Healing Brush does a much better job of blending with the background. 90005 90002 This built-in intelligence proves extremely helpful when cloning a subject with diverse colors, textures and lighting conditions. Using the Clone Stamp in these situations can 90003 leave you with a lot of noticeably patchy spots 90004 that really stand out from the surrounding area.90005 The Healing Brush Tool makes it easy to clone visually complicated areas. 90002 The photograph above is a good example of a subject with a fairly complicated surface. Using the Clone Stamp tool would have made it quite difficult to paint over the cracked areas while retaining the integrity of the stained stone. Much of the discoloration would have been sacrificed as you sourced smoother areas to erase the cracks. However, the Healing Brush was able to effectively replace the cracked areas with smoother areas, while sampling from the surrounding area to replicate the stains.90005 90012 The Patch Tool 90013 90002 The final healing tool we’ll examine is the Patch tool, which can be found under the Healing Brush tool, as seen below. 90005 90002 90005 90002 Tip: hit Shift + J to cycle between the tools in the fly-out menu. 90005 90002 The cloning tools we’ve examined so far are best when used meticulously on small portions of an image. By contrast, the Patch tool is the best way to 90003 clone large, relatively uniform areas. 90004 As with the other healing tools, the Patch tool not only performs a straight clone but attempts to blend in the edge of the selected area with the target environment.90005 90002 To use the Patch tool, either make a selection with any of the selection tools, or simply select an area with the Patch tool’s built-in lasso. There are two modes to choose from for the behavior of the patch: «Source» and «Destination» (found in the menu bar above the document area). 90005 90028 Source Mode 90029 90002 With the source mode selected, first select the area of the image you want to replace, and then drag that selection to the area you want to source. For instance, to eliminate the golf ball in the image below, you would first select the area around the golf ball, and then drag that selection around to find the best source.90005 In source mode, first select the area you want to replace. 90002 As you drag the selection around to find a suitable source, watch the destination (i.e. your originally selected area) for a preview of what the source pixels will look like in that area. Keep in mind that this preview is a straight clone without any blending (the final image will look much better). Release the selection to see the actual result. 90005 The Patch tool’s result. 90002 As you can see, it does a pretty impressive job of blending the source and destination pixels all on its own.But going over areas that need improvement with the Healing Brush is good practice. 90005 90028 Destination Mode 90029 90002 With «Destination» mode selected, the area you select first will be the area that is replicated elsewhere. For instance, if we start with the same selection as before, dragging the selection this time gives us a preview of copying the ball to a new location. 90005 Patch tool destination mode. 90002 After you release the selection, the golf ball is copied to a new area of the image and blended with the surrounding pixels.90005 Result of «Destination» mode. 90012 The Clone Source Palette 90013 90002 The Clone Source palette (found under 90057 Window → Clone Source 90058) is an invaluable resource for professional-quality cloning. This tool gives you much more control over the results and functionality of the Clone Stamp and Healing Brush. 90005 90002 The Clone Source palette contains three primary sections: cloning source, offset adjustment and overlay options. 90005 90002 90005 90002 The Clone Source palette.90005 90028 Cloning Sources 90029 90002 In the first section in the Clone Source palette, 90003 you can define multiple areas of an image as a source 90004 from which to clone and / or heal. 90005 90002 90005 90002 Defining multiple sources. 90005 90002 The image above illustrates an example of when you might want to define multiple sources. To save a source, click on one of the five source buttons, and then 90057 Option + click 90058 (90057 Alt + click 90058) with either the Clone Stamp or Healing Brush.That location will now be saved to that button. Now, select the next button in line, and do the same in another part of the image. Once your sources are loaded, you can quickly shift between them simply by clicking the related button. 90005 90002 Notice that the file name appears just under the clone source buttons. This is because 90003 you can actually select a clone source outside of the image 90004 that you’re working on. Simply open a different file and set the clone source. Then, when you go back to the primary file to paint with the Clone Stamp or Healing Brush, the pixels from the other image will function as the source of the clone.90005 90028 Offset Options 90029 90002 The second section of commands in the Clone Source palette really increase the variety of cloned results available to you. You can set exact coordinates for the source, change the size of the cloned result relative to the original source, tweak the rotation of the result and set a precise offset (again, relative to the original source). 90005 90002 90005 90002 Tweaking the cloned results. 90005 90002 You can see these transformation effects in action in the example above.The two bails of hay are actually one and the same, but they look considerably different because of the offset options. First, I set both the width and height to 90%, so that the cloned bail would appear slightly smaller than the original. Then I changed the width to -90% to flip the clone horizontally (you could change the height to a negative number to flip the image vertically). Finally, I set the rotation to 10 ° to give the illusion of a small hill. 90005 90028 Overlay Options 90029 90002 The overlay options are among the most helpful features in the Clone Source palette.Years ago, cloning involved a lot of guess work because it was difficult to tell exactly what the selected sample would look like without actually applying it. The guesswork has been eliminated with the «Show Overlay» command. When «Show Overlay» is selected in conjunction with the «Clipped» option, 90003 your brush is shown with a preview of the clone source inside 90004. This is extremely helpful when attempting to clone inorganic areas with straight edges, such as a brick wall. 90005 90002 90005 90002 An overlay of the source is displayed within the brush.90005 90002 Note that if you choose to turn on the overlay but turn off «Clipped,» then your entire clone source layer will be shown surrounding the brush. 90005 90002 Working this way is actually quite difficult because the source significantly blocks your view of the destination. But if you prefer it, try reducing the opacity of the overlay so that you can see the image below. 90005 90012 Vanishing Point 90013 90002 Vanishing Point takes cloning to an entirely new dimension, literally. The tool makes it possible to set up primitive planes across your artwork, which a clone then follows to simulate a three-dimensional space.Vanishing Point has a ton of features and potential applications, and it really merits its own entire article, so this will be just a brief introduction. 90005 90002 When you open up the Vanishing Point dialog (found under the «Filter» menu item), you’ll see a large preview of your image, along with a small set of tools on the left side. 90005 90101 90057 The Vanishing Point dialog. 90058 90002 Grab the tool sitting second from the top to set up your initial plane. With this tool, click once on each of the four corners, outlining the desired plane.Once you’ve created an initial plane, you can 90057 Command + click 90058 (90057 Control + click 90058 on a PC) to extend the plane perpendicularly. Some images, though, like this old barn, will not have perfect angles. In this case, you’ll have to create a second plane, entirely distinct from the original. 90005 90101 90057 Setting up planes. 90058 90002 Once you’re satisfied with the planes, grab the Clone Stamp (fourth from the top), and 90057 Option + click 90058 the desired source (in our case, the barn door).Then clone the door onto the front-facing wall using the same method you would use with the normal Clone Stamp tool. Turn «Healing» on in the drop-down menu above the image preview to ensure that the source is properly blended into the destination. 90005 90101 90057 Vanishing Point result. 90058 90002 As you can see, Photoshop interpreted the planes fairly well. Some fine-tuning and clean-up are definitely necessary if we want a believable image; but overall, the result is extremely impressive, given the lack of work required.90005 90012 5 Quick Tips For Better Cloning 90013 90002 Now that we’ve examined each tool in depth, let’s close by recalling a few things to keep in mind if we want to clone with professional results. 90005 90028 Take Your Time 90029 90002 As you undertake a cloning project, the quality of the result is directly proportional to the amount of time you put into it. Cloning photographic details can be incredibly tedious work. The world has become well acquainted with Photoshop magic, so never assume that no one will notice your blunders.90005 90028 Duplicate the Active Layer 90029 90002 The very first step to take when cloning parts of an image is to duplicate the layer you’ll be working on (or to just work on a new transparent layer). Realizing that you made a mistake so long ago that your «Undos» do not go back far enough to fix it is beyond frustrating. Keeping the original image on a hidden layer gives you the flexibility to revert any part of an image to its original state. 90005 90028 Be Selective With Your Tools 90029 90002 Each cloning tool has its strengths and weaknesses, as outlined above.Never arbitrarily grab a tool and stick with it for the duration of a project. Consider which tool is best suited to the particular area of the image you’re working on. On large projects, no single tool creates believable results on its own. Use two or more tools in synergy to achieve a realistic result. 90005 90028 Watch for Obvious Duplication 90029 Sloppy cloning results in noticeable patterns. 90002 If you’re not careful, duplicated pixels can become painfully obvious. This is especially true of areas that should look fairly organic, like the grass above.Instead of appearing natural, an obvious pattern emerges when you use the same section of an image over and over. To avoid this, make heavy use of the Clone Source palette. Use multiple sources; and change the size, rotation and orientation of the areas you’re cloning to give the illusion of an unmanipulated image. 90005 90028 Avoid Disasters 90029 90002 When retouching significant parts of an image, overlooking certain areas becomes all too easy. 90005 Where did her leg go !? 90002 If you’re not careful, you could eliminate enough vital body parts to make the image humorous.Your goal is to prevent your work from showing up on Photoshop Disasters, which is where you’ll find the image above. 90005 90012 Conclusion 90013 90002 Cloning in Photoshop is a difficult task that requires significant time, studious attention to detail and an in-depth knowledge of several tools and commands. To improve the quality of your results, invest some time learning Photoshop’s entire cloning arsenal. Experiment with all of the options for each tool to get a better feel for where you can excel.90005 90028 Additional Resources 90029 90286 (Al).90000 Cloning in Photoshop — Learn How to Use the Clone Tool 90001 90002 90003 Photoshop’s Clone Tool Can Save You a Lot of Time Having to Re-shoot 90004 90005 90002 90007 Cloning in Photoshop 90008 — The clone tool has, on more than one occasion, been my best friend in this line of work. There are going to be times when it is simply invaluable; 90005 90010 90011 To clean up rubbish, leaves, stains or spots from your images 90012 90011 To remove unwanted wires, marks, objects or people that you missed whilst photographing the property 90012 90011 You can even clone IN items such as flowers, books etc, to improve the image as long as you do it right 90012 90017 90002 When cloning in OR out, it is important to do it right, anything else will just look bad.90005 90002 Do not under any circumstances remove permanent fixtures or fittings. Items such as doors, walls, trees or bushes or anything that will be there when a person visits. Misrepresentation is not the work of a professional. 90005 90022 Clone Tool 90023 90024 90002 The clone tool should be used to simply enhance an image and only to do what could be done easily anyway. For example, a stain on a wall or carpet could easily be actually removed before or after any visits. They will not stand out as much as removing a chimney pot to make the house look nicer for example.90005 90002 For my first example, see the image below. The 2 white arrows in the image, point to objects that we wish to remove. One is a cable from a lamp and the other, a black folder on the white sideboard. Both items really stand out and the image would be enhanced with their removal. 90005 90002 Cloning in Photoshop — Fig.1 90005 90002 When cloning at this level always zoom in to 100% or more, it does not matter if the image appears very «pixelated», work on it and when you zoom out, all is well again.90005 90033 Cloning in Photoshop — Brush Type and Size 90024 90002 I generally tend to use a «fuzzy» brush with soft edges and a flow of between 10 and 30%. For really fine detail it is best to use a smaller flow% to work the areas extremely slowly and gradually to prevent «obvious» changes. Think of it like painting; bold, harsh paintbrush strokes really stand out, whereas an airbrush lightly spraying paint onto a canvas gives a more subtle approach. 90005 90037 Cloning in Photoshop — Sampling 90024 90002 To remove items seamlessly and convincingly, you need to take your «samples» for cloning from areas directly surrounding the item you wish to remove.This will keep in with the general look and feel of the image and make the alterations invisible. 90005 90002 In the image below, you can see that I am taking information from an area very close to the object. The cross denotes the area from which the information is taken. The circle shows where it is being placed or cloned to. 90005 90002 Cloning in Photoshop — Fig.2 90005 90002 This will keep the lighting and textures as uniform and consistent as possible for a more realistic effect. If you end up with areas that stand out after cloning, you can either: 90005 90010 90011 Use a really fine, slow flowing brush to gradually merge and blend the 2 areas 90012 90011 Try the small «healing» brush to blend them together 90012 90017 90002 Should you come across more difficult areas such as the lines or grouting in between the tiles, take your sample from dead center on the line and make sure that you begin cloning from dead center along the line further up.Try practising this as your accuracy is very important. 90005 90002 If you get it wrong, just CTRL + ALT + Z to step back a stage and try again. 90005 90002 The more you practice, the more you will become familiar and at ease with all the settings. Cloning will become second nature. 90005 90002 As you can see below, the untrained eye would never know that there was ever anything there other than clean tiles. Especially when you have zoomed back out and viewing the whole image. 90005 90002 Cloning in Photoshop — Fig.3 90005 90063 Cloning in Photoshop — Shiny Surfaces 90024 90002 Watch out for reflections when cloning. Use the same rules as above and remember to follow the lines and general feel of the image. You may need to get a little artistic to replace lost information. Just take it, once again, from a nearby area to keep it uniform and seamless. 90005 90002 As in the image below, keep the cross and circle (sample and target) in line with the lines of the wall. That way, if you stray, you will not be painting extra lines anywhere.90005 90002 Cloning in Photoshop — Fig.4 90005 90002 Do the same for the reflections on the surface area, try and keep it real as in the image here. 90005 90002 Cloning in Photoshop — Fig.5 90005 90002 Once more, when zoomed back out, you can see the effect that cloning and cleaning up an image can have. Make sure that you learn to do this well as it will become your best friend too! 90005 90002 Cloning in Photoshop — Fig.6 90005 90079 Cloning in Photoshop — Extreme Example of Cloning 90024 90002 When it came to the exterior shots of a villa I once photographed, I stepped outside of the expensive property only to find the swimming pool completely surrounded by a metal fence.Rather than tearing it down and replacing later, the owner asked if I could magically remove this in Photoshop to assist the viewings and potential sales as the exterior shot would be the main image for promoting the property … great! 90005 90002 Cloning in Photoshop — Fig.7 90005 90002 Being the kind, professional chap that I am, I said «Yes! No problem!» 90005 90002 Once I loaded the image in Photoshop, I realised that it may be a little more difficult than I had first thought. Not only was the meshing quite fine, but there were places where it overlapped other parts of the fence AND I had the reflections in the pool to deal with.90005 90089 Intricate Cloning 90023 90024 90002 I will not go into TOO much detail about how I did it, but the 3 images below show just how intricate the work was in some parts. 90005 90002 This first image above shows a close up of the cloning area. I was using the smallest brush possible, just ONE PIXEL !!! This was necessary to follow my rule above whereby I took the samples from areas directly surrounding the information I wanted to remove. Once you have done a small area, you can increase the size of the brush and spiral outwards whilst cloning.90005 90002 The next image shows slightly a more «zoomed out» image of the area … 90005 90002 And the last picture shows the area as a full size image, it really was time consuming. 90005 90002 This crop of the swimming pool shows just how much detail I had to remove and the following image shows the result. All the reflections of the house have been kept in to retain all of the original detail. It is not 100% perfect by any means, but when viewed at full size, it is barely noticeable. 90005 90002 Cloning in Photoshop Fig 11 90005 90002 The last image shows the final result which, I am happy to say, the owner was fairly pleased with.90005 90002 It seems like so much work for so little return at the time. However, people remember things and will (hopefully) tell other people about your dedication to your work. 90005 90002 Try to make the effort on all of your jobs and you will soon start to get a reputation that will excel you in the photography world. 90005.90000 How to Use the Clone Stamp Tool in Photoshop (Step by Step!) 90001 90002 Knowing how to use the clone stamp tool in Photoshop is essential when editing photos. 90003 It lets you remove objects and imperfections by duplicating pixels. The difference with other Photoshop tools is that you have full control. 90003 Read on to learn the basics of the clone stamp tool. 90005 90006 Where to Find the Clone Stamp Tool in Photoshop 90007 90002 You can find the clone stamp in the tool bar on the left hand side.The shortcut for the clone stamp for both Mac OS and Windows is S. 90003 90010 90003 If you can not see the tool bar on the left, make it visible using the ‘Window’ menu. 90003 Click on ‘Tools’ all the way down in the menu. 90003 90014 90003 For more difficult projects you will also need the ‘Clone Source’ panel. 90003 You can also find it in the ‘Window’ menu. 90003 90018 90005 90006 Remove Unwanted Objects With the Clone Stamp Tool 90007 90002 Imperfections or distractions could mess up a great fashion or publicity photo.Luckily, removing them with the clone stamp tool is easy. 90003 The clone stamp can remove anything from wires, dust spots, unwanted hair, and even people. It does this by cloning pixels from another part of the photo. 90003 Let’s say I want to remove the man’s sandals in the photo from a beach in India. I’ll show you how to do that with the clone stamp tool. 90005 90026 © Joris Hermans 90027 Step 1: Open the photo and zoom in 90028 90002 Open the photo you want to clean up and zoom in on the area you want to work with.Not too close, so you can still see what’s going on. 90003 Click on the clone stamp tool in the tool bar on the left. 90003 Always duplicate the background layer before you start working. This way, you can always go back to the original photo. Right click on the background layer and select ‘Duplicate Layer …’. 90003 90033 90005 90027 Step 2: Select a clone source 90028 90002 Pick a soft brush. Set the size of the clone stamp so it will cover the object you want to remove. It takes some practice to know how hard and big your brush should be.90003 A good setting to start is a medium soft brush to achieve smooth edges. 90003 90040 90003 Move the cursor to the area you want to take pixels from. In this case I need sand. Use Alt-click to confirm your source pixels. The cursor will change into crosshairs. 90003 The moment you click, the cursor will change and show the pixels you’ve cloned. 90003 90044 90005 90027 Step 3: Paint over the object you want to remove 90028 90002 Now start painting over the object you want to remove. Make sure it’s not obvious that you are duplicating another part of the photo.90003 If it’s noticeable, go back to clone other pixels and continue painting. 90003 90051 90003 Repeat this until everything looks natural. If you want to go a few steps back in Photoshop, use undo. Cmd + Z in Mac OS or Ctrl + Z in Windows. 90003 What you have to look out for is patterns. Patterns will give away the fact that you’ve cloned pixels and removed an object. 90003 90055 90005 90027 Avoid patterns to make the cloning look natural 90028 90002 The clone source panel comes in handy when trying to avoid patterns.Use the two mirror buttons to make your cloning look more natural. 90003 This will mirror the pixels you paint over the unwanted object. The result will look better. 90003 90062 90003 Playing around with the opacity of the brush will also help. Always try to mix different clone sources and opacity settings to get the best result. 90003 The edges of the clone stamp have to be as smooth as possible. 90003 90066 90005 90006 Remove Skin Imperfections With the Clone Stamp Tool in Photoshop 90007 90002 Here’s another way to use the clone stamp tool in Photoshop.It’s the perfect tool to remove skin imperfections. 90003 I’ll show you a specific technique that allows you to clean up imperfections and keep a natural look. 90003 I’m going to remove some spots from this man’s face. 90005 90027 Step 1: Open the photo and duplicate the background layer 90028 90002 Open the photo and duplicate the background layer. Right click and select ‘Duplicate Layer …’. 90003 90078 90003 Now zoom in on the area with the skin imperfections you want to remove with the clone stamp.90003 It’s better now to zoom in all the way to 100%. 90003 90082 90005 90027 Step 2: Select a clone source 90028 90002 Repeat ‘Step 2’ from the example above. This time, pick a part of the skin that’s similar looking to where the imperfections are. 90005 90027 Step 3: Select brush mode 90028 90002 This is what makes this an excellent technique to remove skin imperfections. It allows you to target specific details that you want to remove. 90003 Set the brush mode to ‘Lighten’. The clone stamp will now only affect areas of the skin that are darker than the clone source selection.90003 In this case, it will only affect the darker coloured mole and make it lighter to match the skin around it. The rest of the skin will stay untouched. 90003 90094 90003 Set the brush mode to ‘Darken’ and the opposite will happen. 90003 I like this technique to remove wrinkles or spots on the skin. By setting the brush mode to ‘Lighten’ or ‘Darken’ you can target specific areas of the skin. 90003 The result looks very natural. 90005 90027 Step 4: Paint Over the Imperfection 90028 90002 Paint one or two times over the imperfection.90003 90103 90005 90006 Conclusion 90007 90002 It takes practice to master the use of the clone stamp in Photoshop but it’s well worth it. It will not blend pixels like the healing brush tool. This gives you full control. 90003 Start with easy Photoshop projects like removing dust spots or small skin imperfections. 90003 Once you master this, you can move on to removing objects or even people. Always look out for patterns when you think you’re finished! 90003 Patterns give away the fact that you’ve removed an object and it looks ugly and unnatural.90003 Also, only use the clone stamp when necessary and for certain types of photography. Do not remove objects from a photo if you’re practising photojournalism or documentary. It’s just not done. 90005 90113 pin it! 90002 Save this article to your Pinterest profile to access it later! 90005 .90000 Use the Clone Stamp Tool in Photoshop CS5 90001 90002 90003 90004 90003 Software 90004 90003 Adobe 90004 90003 Photoshop 90004 90003 Use the Clone Stamp Tool in Photoshop CS5 90004 90013 90014 By Jennifer Smith, Christopher Smith, Fred Gerantabee 90015 90014 The Clone Stamp tool is used for pixel-to-pixel cloning in Adobe Photoshop Creative Suite 5. The Clone Stamp tool is different from the Healing Brush tool in that it does no automatic blending into the target area.You can use the Clone Stamp tool for removing a product name from an image, replacing a telephone wire that’s crossing in front of a building, or duplicating an item. 90015 90014 Here’s how to use the Clone Stamp tool: 90015 90002 90003 90014 With the Clone Stamp tool selected, position the cursor over the area you want to clone and then Alt-click (Windows) or Option-click (Mac) to define the clone source. 90015 90004 90003 90014 Position the cursor over the area where you want to paint the cloned pixels and then start painting.90015 90014 Note the cross hair at the original sampled area. While you’re painting, the cross hair follows the pixels you’re cloning. 90015 90014 A cross hair over the source shows what you’re cloning. 90015 90004 90013 90014 When using the Clone Stamp tool for touching up images, you should resample many times so as to not leave a seam where you replaced pixels. A good clone stamper Alt-clicks (Windows) or Option-clicks (Mac) and paints many times over until the retouching is complete.90015 90014 Choose Window → Clone Source to open the Clone Source panel. With this handy little panel, you can save multiple clone sources to refer to while working. Even better, you can scale, preview, and rotate your clone source — before you start cloning. 90015 90014 Additional options in the Clone Source panel. In this example the apple rotates 180 degrees while being cloned. 90015 90014 The Clone Source panel can be extremely helpful with difficult retouching projects that involve a little more precision.90015 90014 Follow these steps to experiment with this fun and interactive panel: 90015 90002 90003 90014 If the Clone Source panel is not visible, choose Window → Clone Source. 90015 90014 The Clone Source icons across the top have yet to be defined. The firststamp is selected as a default. 90015 90004 90003 90014 Alt-click (Windows) or Option-click (Mac) in the image area to record the first clone source. 90015 90004 90003 90014 Click the second Clone Source icon at the top of the Clone Source panel.90015 90004 90003 90014 Alt-click (Windows) or Option-click (Mac) somewhere else on the page to define a second clone source. 90015 90014 Repeat as needed to define more clone sources. You can click the Clone Source icons at any time to retrieve the clone source and start cloning. 90015 90004 90003 90014 Enter any numbers you want in the Offset X and Y, W and H. 90015 90014 Angle text boxes in the center section of the Clone Source panel to set up transformations before you clone.90015 90004 90003 90014 Select the Show Overlay check box to see a preview of your clone source. 90015 90014 Whatever you plan to do, it’s much easier to see a preview before you start cloning. If you do not use the Clone Source panel for anything else, use it to see a preview of your clone source before you start painting. If it helps to see the clone source better, select the Invert check box. 90015 90014 You see an 90077 overlay 90078 (or preview) before cloning begins. This overlay helps you better align your image, which is helpful for precision work.If you want the preview to go away after you start cloning, select the Auto Hide check box. 90015 90004 90013 .